

Some jobs are so large, they require larger duct. They were glad to know there is a way to create larger sizes, and I thought there might be others that could benefit from knowing how to add to the available duct sizes.
Ducts are constrained by the catalog in which they are defined. These catalogs can be altered by using the Catalog Editor. Invoke the Catalog Editor by selecting it from under the MEP Common pulldown menu.

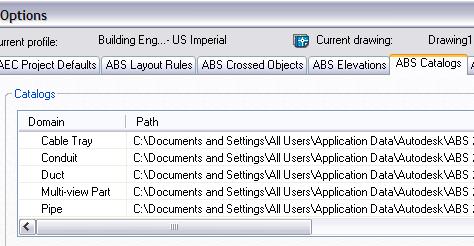
Before opening the Catalog Editor, check the ABS Catalogs tab in Options to find the duct catalog you are using. Mine is buried in C:\Documents and Settings\All Users\Application Data\Autodesk\ABS 2006\enu\Aecb Catalogs\ Duct US Imperial.apc
Once opened, drill down to Duct US Imperial\Rectangular\Slip Joint\Ducts\Rectangular Duct Slip Joint\Constant Lists.

To add additional heights and widths, scroll to the bottom of the list and right click on the gray square under the last available size. Select “Insert” and then “Cell”. Now type in your new height or width.
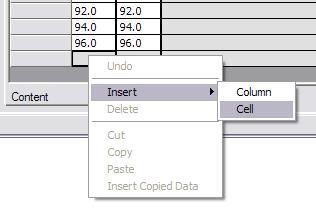
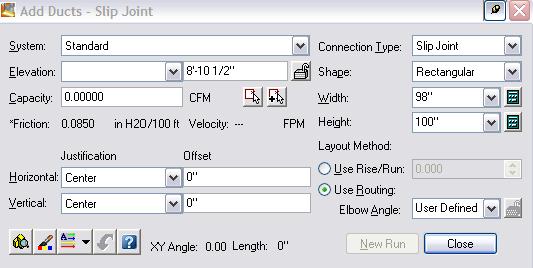
I added 98 and 100 to both columns in this example. Save and close the Catalog Editor. Now return to the MEP Common pull down and select “Regenerate Catalog”. Type “D” on the command line to regenerate the Duct catalog. Now when you select the Add Duct tool the new sizes are available.
Keep in mind, we have only added duct sizes. To effectively add duct you will have to repeat this process to add the appropriate elbows and transition sizes.
This is a good place to begin if you are ready to start exploring the Catalog Editor, but please be careful and back up what you don’t want destroyed. Too much exploring and playing around could back fire here with catastrophic results. Till next time, Good Luck.
No comments:
Post a Comment